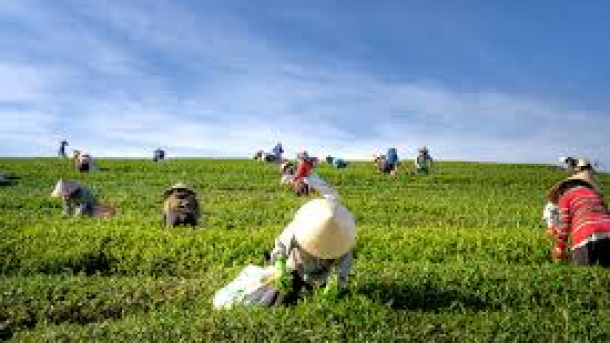

Macropropagation of Musa Species
Macropropagation is a vegetative plant multiplication technique that involves the stimulation of multiple shoots from a single parent planting material (usually a corm) under controlled but non-sterile conditions. It is a low-cost, farmer-friendly alternative to tissue culture and is widely used for the rapid multiplication of Musa species (banana and plantain). The method relies on physical manipulation of the corm to break apical dominance, thereby inducing the production of several healthy suckers that can be transplanted to the field.
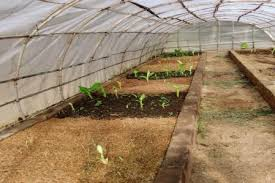
Construction of the Propagator
At this stage, the objective is to construct a facility known as a propagator, where the processed corms will be cultivated. The propagator is usually constructed using wooden planks and nails. Its dimensions depend on the available space, resources, and the number of corms to be managed. The height of the propagator is typically equal to the width of the wooden planks used.
The propagator is rectangular in shape and should be placed on a cemented floor or waterproofed ground to prevent roots from penetrating the soil beneath. Root penetration into the soil complicates shoot detachment, as the roots may be cut during harvesting. Plantlets without roots often experience difficulty in anchorage and nutrient uptake, which can lead to poor establishment or death. The propagator should also be located under shade to protect the corms and emerging shoots from direct sunlight.
Filling of the Propagator
Since the propagator serves as a cultivation medium, it must be filled with a suitable substrate. The substrates used are typically soilless and porous to allow easy harvesting of suckers and replanting of corms. Common substrates include sawdust, rice husk, spear grass, or similar materials.
Before use, the substrate must be sterilized using steam to eliminate pathogens. To achieve this, a reasonable quantity of water is poured into a drum containing stones. The water level should be slightly below the stones to ensure that the substrate does not come into direct contact with water during steaming. The substrates are bagged and placed on the stones, ensuring no contact between the bags and water. The drum is then covered with a lid and heated. Steaming is continued for about 30 minutes after the water begins to boil.
After steaming, the substrate is removed and spread evenly in a clean propagator until it reaches the height of the propagator. The substrate should be allowed to cool for at least 24 hours before planting the processed corms.
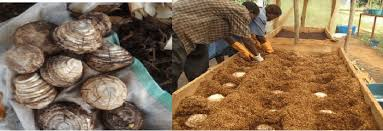
Sucker Collection and Corm Preparation
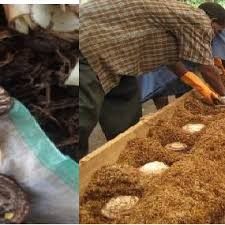
Healthy, disease-free sword suckers are sourced from the field. Preparation begins by removing the pseudostem and roots from the sucker. The corm is thoroughly washed in clean water to remove soil and plant debris.
Using a clean, sharp knife, the leaf sheaths of the corm are carefully peeled off one after another to expose the bud and meristematic region, leaving about 2 mm above the corm. To suppress apical dominance and prevent shooting from the top, the meristematic region is drilled or scarified by making an “X”-shaped incision at the top of the corm.
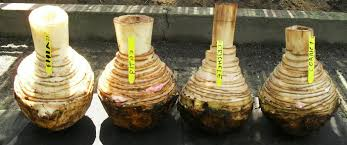
The prepared corms are surface-sterilized by soaking them in a sterilant for 20 minutes. The sterilant may consist of water mixed with a fungicide or 10 ml of sodium hypochlorite in 25 litres of water. After sterilization, the corms are air-dried for about one day before planting in the propagator.
Planting of Corms
The processed corms are planted into the substrate in the propagator, maintaining a spacing of about 10 inches between one corm and another, as well as between the corms and the sides of the propagator. Care should be taken to ensure that the corms do not touch the floor and that they are adequately covered with the substrate.
Propagator Maintenance and Management
Immediately after planting, the substrate should be watered thoroughly until it is well soaked. The first irrigation usually requires a larger volume of water compared to subsequent irrigations. Thereafter, watering should be carried out every one or two days, depending on moisture levels, while avoiding waterlogging. Excessive waterlogging can create favourable conditions for disease vectors such as mosquitoes, thereby increasing the risk of malaria.
Measures should also be taken to control rodents and lizards, as they may feed on the corms and emerging shoots. Additionally, these animals may pose safety risks to humans working around the propagator.
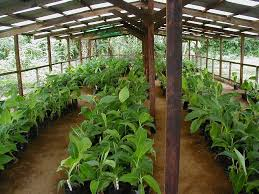
Preparation of Pots and Weaning Media
After shoot detachment, the plantlets are not transferred directly to the field. Instead, they are first established in a weaning medium and environment to help them overcome transplant shock. Nylon pots measuring approximately 4 inches in width and 5 inches in height (or larger) are prepared by creating drainage holes at the base and slightly above the base to prevent waterlogging.
The weaning medium is prepared by mixing topsoil and compost manure in a ratio of 3:1. The prepared medium is then used to fill the pots in readiness for planting the detached shoots.
Detachment or Harvesting of Shoots
Within 4 to 8 weeks, each corm may produce between 3 and 7 shoots, depending on the Musa species, corm viability, and efficiency in executing the macropropagation process. Shoots with three to four leaves are detached using a very clean and sharp knife.
During detachment, care should be taken to avoid damaging the roots, and a reasonable amount of corm tissue should be cut along with the shoot. This attached tissue serves as a food reserve until the plantlet becomes fully acclimatized and can independently source nutrients from the soil.
The detached shoots are planted into the prepared weaning pots and watered carefully at intervals to prevent waterlogging and nutrient loss. After two to four weeks, the plantlets are ready for field transplantation.
For field planting, holes large enough to accommodate the pots are dug. The nylon pots are carefully cut open using a razor blade or sharp knife, and the entire plant with its weaning medium is placed into the hole and covered with soil. Transplanting is most successful when carried out at the onset of the rainy season.